Claris has announced that FileMaker Cloud 2025 (v2.22) is arriving in November, bringing faster performance, new security updates, and a few critical compatibility changes.
For most developers, this release isn’t about flashy new features; it’s about alignment: keeping your apps compatible, secure, and future-ready as the FileMaker platform continues its cloud-first evolution.
Why It Matters
The new FileMaker Cloud version introduces an updated security infrastructure, improved monitoring, and performance optimizations, all built on the same Ubuntu foundation as FileMaker Server 2025.
But the real story is compatibility: older clients won’t connect after the upgrade. That means organizations running legacy versions of FileMaker Pro or Go need to update before November 6 to avoid user lockouts or connection errors.
In other words: If you’re running FileMaker Pro earlier than 20.3.2 or FileMaker Go before version 21, plan your upgrades now.
What’s New
FileMaker Cloud 2025 brings:
Enhanced encryption and security certification (SOC 2 Type 2, ISO/IEC)
Expanded AWS region support for better regional performance and compliance
Proactive infrastructure management handled entirely by Claris (patching, updates, OS maintenance)
Improved version-checking tools so admins can automatically prompt users to update
Together, these updates continue Claris’s push toward a self-maintaining, secure, and scalable FileMaker environment (especially for organizations ready to offload infrastructure management).
How to Prepare
If you’re an administrator:
Audit your connected clients. Use the Admin Console’s Access.log or Claris’s sample file to check which FileMaker Pro/Go versions are still in use.
Set up an upgrade prompt. You can script a simple version check using Get ( ApplicationVersion ) on file open. Claris even provides a template!
Review your maintenance schedule. Manual upgrades open November 6, and systems with automatic maintenance will update during their next scheduled window.
For teams that rely on continuous uptime, this is a good opportunity to test in a staging environment before upgrading production systems.
Where It Fits
Claris continues to narrow the gap between on-premise and cloud deployments, with FileMaker Cloud now offering many of the same administrative controls as FileMaker Server (but without the maintenance burden).
For Kyo Logic clients, we see FileMaker Cloud 2025 as a strong fit for:
Teams that need enterprise-grade security without managing servers
Organizations with distributed workforces or multi-region access needs
Businesses planning to integrate Claris Connect or AI-driven features that depend on modern infrastructure
If you’re still hosting your own FileMaker Server but curious about the cloud transition, this release makes the case stronger than ever.
Kyo Logic’s Take
Claris isn’t just maintaining the platform; they’re future-proofing it. With FileMaker Cloud 2025, the company is making sure that as FileMaker continues to integrate AI, APIs, and data services, your infrastructure won’t hold you back.
We recommend using this update window to:
Confirm client version compliance
Evaluate whether your hosting environment still fits your operational goals
Explore modernization opportunities, like hybrid AI or analytics layers built on FileMaker 2025
Need help preparing or auditing your deployment?
We’re helping clients plan clean upgrade paths now before the November rollout.
FileMaker 2025 brings a new level of security to both FileMaker Cloud and FileMaker Server, delivering critical enhancements in encryption, SSL handling, and API authentication. These updates are designed to help organizations strengthen data protection and meet stringent compliance requirements, including HIPAA, GDPR, and enterprise-grade security standards.
Whether deployed on-premises or in the cloud, FileMaker 2025 ensures that your sensitive business data stays safe, encrypted, and under your control.
Stronger Encryption and Data Protection
FileMaker 2025 enhances encryption protocols for both data at rest and data in transit. Improved key management and modern cipher support ensure that databases, backups, and network communications maintain top-tier protection.
For organizations managing confidential information—such as healthcare providers, financial institutions, and manufacturers—these encryption upgrades reinforce compliance with global privacy laws and data protection frameworks.
Simplified SSL Management with Let’s Encrypt
Setting up SSL certificates has historically been a challenge for administrators. FileMaker Server 2025 streamlines this process with Let’s Encrypt integration, allowing certificates to be issued and renewed automatically.
This eliminates the need for manual SSL management while ensuring that all connections remain encrypted and compliant with modern browser and network security requirements.
Benefits include:
Automatic SSL issuance and renewal
Reduced configuration errors
Continuous, secure connections across all deployments
Token-Based API Access for Secure Integrations
Both FileMaker Cloud and FileMaker Server now support token-based authentication for API access, replacing static credentials with dynamic, revocable tokens.
This approach enhances integration security by ensuring that credentials:
Expire automatically after a defined period
Can be scoped to specific permissions or resources
Are easily revoked if compromised
Token-based authentication reduces the attack surface and makes it easier to comply with HIPAA and GDPR requirements for data access auditing and control.
Compliance Made Easier
With these security upgrades, FileMaker 2025 provides organizations with a compliance-ready foundation. Key benefits include:
Encrypted data across all layers—storage, transfer, and access
Automated SSL configuration to prevent mismanagement
Secure, auditable API integrations using short-lived tokens
For industries handling sensitive personal or operational data, these improvements simplify compliance management without sacrificing performance or flexibility.
FileMaker 2025’s security enhancements in Cloud and Server reflect Claris’s continued commitment to protecting business-critical information. With improved encryption, automatic SSL handling, and token-based API access, organizations can maintain compliance and operate confidently in highly regulated environments.
Want to strengthen your FileMaker security posture or validate your setup for HIPAA or GDPR compliance? Reach out to Kyo Logic here.
With FileMaker 2025, Claris FileMaker Cloud introduces a more robust approach to API authentication: token-based security. This enhancement is designed to protect data in transit, simplify integration management, and meet stricter compliance requirements like GDPR and HIPAA—all while making API access easier to administer.
What Is Token-Based API Security?
Traditional API authentication often relies on static credentials or passwords embedded in integrations. Token-based security replaces these credentials with temporary, revocable tokens that are issued for a specific session or scope.
This means:
Credentials aren’t hard-coded into scripts or third-party apps
Access can be revoked instantly without changing every integration
Benefits for GDPR and HIPAA Compliance
For organizations handling personal or sensitive data, token-based API authentication supports compliance in several ways:
Granular Access Control: Tokens can be issued with specific permissions for limited resources or time periods.
Reduced Exposure: Tokens expire automatically, minimizing the window of vulnerability if compromised.
Auditability: API access logs show exactly which token was used, when, and for what purpose—critical for audits.
These features align with best practices for data protection and regulatory compliance.
How It Works in FileMaker Cloud
Developers and administrators can now:
Generate tokens programmatically when a session begins
Use tokens to authenticate API calls instead of embedding credentials
Revoke or rotate tokens from a central dashboard without touching scripts
This approach makes integrations both more secure and more manageable, especially in large environments or when working with multiple third-party systems.
Why It Matters
Token-based API security in FileMaker Cloud gives IT teams and developers peace of mind. It ensures integrations remain secure by design while reducing manual credential management. This is especially valuable for businesses that must demonstrate GDPR or HIPAA compliance without slowing down development.
FileMaker Cloud’s new token-based API security offers a modern, secure way to manage integrations—perfect for organizations that prioritize data protection and compliance. By replacing static credentials with dynamic, revocable tokens, you can build faster, safer connections to your apps and services.
Want to learn how to implement secure, compliant integrations with Claris FileMaker Cloud? Reach out to Kyo Logic here.
At Kyo Logic, we specialize in custom software solutions and FileMaker consulting services. During one of our recent internal projects, a team member was experimenting with Keycloak 26 on AWS and decided to create a simple, repeatable guide for future reference. We’d like to thank our friends over at Sound Essentials, who provided instructions for installing Keycloak 17 on Ubuntu 20.04.3 LTS. Our instrcutsions would not be possible without their original guidance, which we’ve modified for our own purposes.
We realized it could be helpful to share this process more broadly. Below you’ll find a step-by-step outline of how to get Keycloak 26 up and running on an Ubuntu 24.04 server in AWS, complete with MySQL and SSL certificates managed by Certbot.
Please note that Keycloak is not a FileMaker-related tool. However, as consultants who often deal with diverse infrastructure solutions—ranging from identity management to custom app deployments—it’s important for us to have guides like this in our internal knowledge base. If you have any questions about this or about our FileMaker consulting services, reach out here.
Keycloak is a powerful open‐source identity and access management solution. In this tutorial, we’ll set up Keycloak 26 on an Ubuntu 24.04 server in AWS, secure it with SSL certificates via Certbot, and configure it to run on port 443. We’ll use MySQL as our database.
Note – This guide assumes you have an AWS account and are comfortable with launching EC2 instances and connecting to them. Replace keycloak.mydomain.com with your actual domain name wherever indicated.
What You Need To Get Started
A Linux server running Ubuntu 24.04 (x86) or an account to a server hosting platform such as AWS or Microsoft Azure
A Fully Qualified Domain Name (FQDN) and access to your domain’s Domain Name System (DNS)
1. Create Ubuntu Server
Below are instructions for creating a server using AWS EC2. The instructions should be similar for other services.
Launch a New EC2 Instance
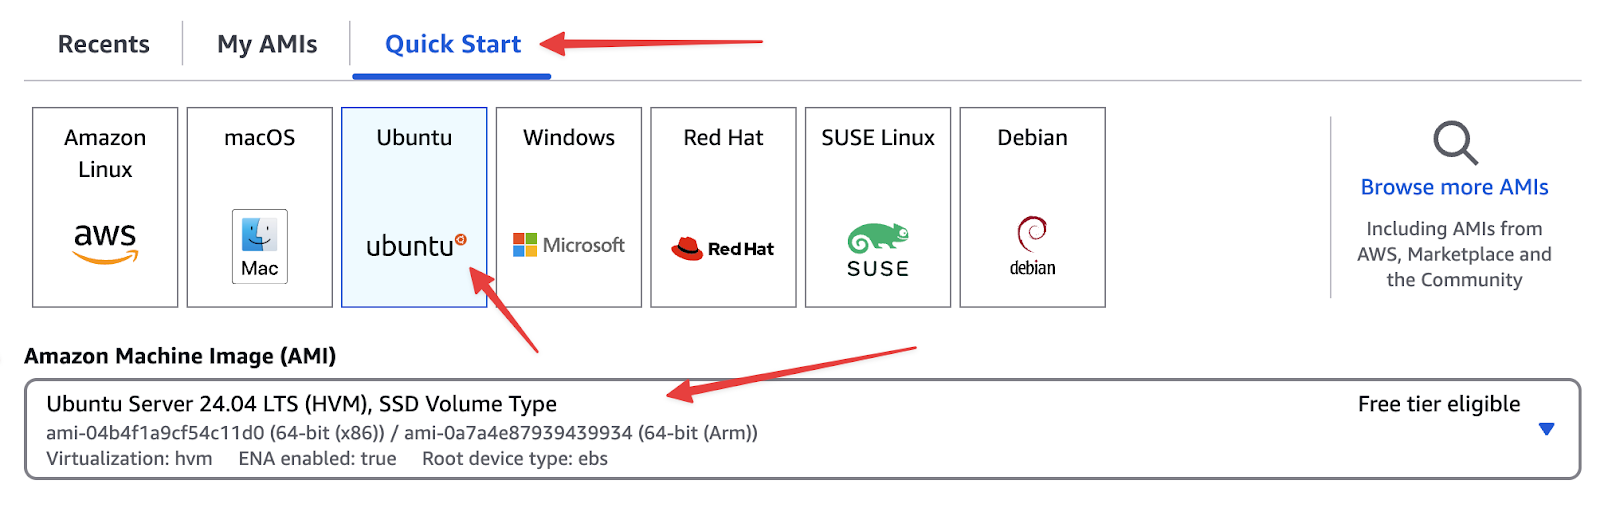
In AWS EC2, click Launch Instance
Select the following options
AMI – Ubuntu 24.04 (x86)
Instance Type – t3a.xlarge (or your preferred size)
Key Pair – Select or create a new key pair
Subnet – Choose an appropriate subnet (e.g., us-east-1c)
Security Groups – Ensure you have rules for SSH (port 22), HTTP (port 80), and HTTPS (port 443 and 8443).
Storage – ~30 GB recommended
IAM Role – If you have an instance profile with needed permissions, select it here (optional but recommended).
Create and Associate Elastic IP
Reserve a new Elastic IP in AWS
Associate it with your new EC2 instance
In your DNS, create an A record for the IP Address of your Elastic IP using the subdomain of your choosing.
Connect to EC2
Use AWS Systems Manager Session Manager or SSH, depending on your preference
If you click on Connect on the Instance, AWS will give you instructions to Connect.
2. Update Ubuntu
When first connecting, it’s best practice to update all packages with the following commands
sudo -i
sudo apt update
sudo apt upgrade
sudo apt dist-upgrade
sudo apt autoremove
sudo shutdown -r now
After the reboot, reconnect to your instance.
3. Install and Configure MySQL
Keycloak needs a database. Here’s how to install MySQL on Ubuntu
cd ~
sudo apt install mysql-server
sudo mysql
Set the root user’s MySQL password
ALTER USER 'root'@'localhost' IDENTIFIED WITH mysql_native_password BY 'MYSQL_DATABASE_PASSWORD';
Exit;
Secure the MySQL installation
sudo mysql_secure_installation
Follow the prompts (you can answer “Yes” to remove anonymous users, disallow root remote login, etc.).
Create the Keycloak database and user
sudo mysql -u root -pMYSQL_DATABASE_PASSWORD
In sql
CREATE DATABASE keycloak CHARACTER SET utf8mb4 COLLATE utf8mb4_unicode_ci;
CREATE USER 'keycloak'@'localhost' IDENTIFIED BY 'MYSQL_DATABASE_PASSWORD';
GRANT ALL PRIVILEGES ON keycloak.* TO 'keycloak'@'localhost';
FLUSH PRIVILEGES;
exit;
Note – Replace MYSQL_DATABASE_PASSWORD with a strong, unique password.
4. Install Certbot (for SSL Certificates)
We’ll use Certbot (via snap) to generate and manage SSL certificates.
cd ~
sudo snap install core
sudo snap refresh core
sudo snap install --classic certbot
sudo ln -s /snap/bin/certbot /usr/bin/certbot
sudo shutdown -r now
After the reboot, reconnect again.
5. Configure the Firewall
We’ll open only the necessary ports. Ubuntu’s default firewall tool is ufw
cd ~
sudo ufw allow ssh
sudo ufw allow 80/tcp
sudo ufw allow 8443/tcp
sudo ufw enable
6. Obtain an SSL Certificate
Choose your domain nameMake sure your DNS is pointed to the IP address of this instance (e.g., keycloak.mydomain.com).
Note – Replace keycloak.mydomain.com with your domain name.Obtain and verify certificate
Note – (Replace keycloak.mydomain.com with your domain name)
https-port=8443
Build and start Keycloak
cd /opt/keycloak/keycloak-26.1.0
sudo bin/kc.sh build
sudo -E bin/kc.sh bootstrap-admin user
Note – This is to create a temporary user for access to keycloak. Once in keycloak, it is recommended that a permanent user be created and this temporary user deleted.
sudo -E bin/kc.sh start
Keycloak should now be running on https://keycloak.mydomain.com:8443/.
Log into keycloak using the account created above and create a new user. Make sure to give this new user all available roles.
10. Configure Keycloak to Start Automatically
Press Ctrl+C to stop Keycloak, then create a systemd service
Create systemd unit file
Keycloak will now listen on standard HTTPS port 443, accessible at https://keycloak.mydomain.com.
You’ve successfully installed Keycloak 26 on an Ubuntu 24.04 EC2 instance, configured MySQL as the backend, and secured Keycloak with a valid SSL certificate using Certbot. You also set up systemd to ensure Keycloak starts automatically on reboot and moved it to port 443 for a cleaner URL.
Next Steps
Log in to your Keycloak admin console at https://keycloak.mydomain.com using the admin username/password you created.
Configure your realms, clients, and identity providers as needed.
Review Keycloak logs and manage system resources to ensure optimal performance.
For more instructions on how to configure your keycloak account, you can follow the instructions from our CFDG presentation on the topic here – https://youtu.be/-bqww9ggDjA
With your identity and access management solution in place, you can focus on integrating Keycloak into your applications and services! If you have any questions or run into issues, consult the official Keycloak documentation or your AWS documentation for further guidance.
That’s it! You now have a working Keycloak 26 setup in AWS. If you have any questions—or if you’d like to learn more about our FileMaker consulting services—visit us here.
After building a custom platform, it needs to be hosted somewhere. That is, all that information needs a place to “live” so it can be accessed through the web. Claris offers its own hosting solution for FileMaker called Claris Server. It’s a fantastic option for FileMaker-based platforms specifically because it integrates so seamlessly into the rest of the FileMaker ecosystem. However, there are other options available that offer their own advantages and disadvantages.
Note that there is another option: businesses can choose to host the content themselves. This typically requires dedicated employees, purchasing servers, and having space to store them. Going with a third-party option is generally more cost-effective and streamlined. Businesses may opt to use one of these hosting solutions if they’re already paying to have these companies host their website or other data.
Amazon Web Services. Amazon offers hosting services that support a wide variety of platforms. AWS is scalable and offers very flexible pricing options. AWS offers a range of services, and their databases can host FileMaker. AWS also gives subscribers a considerable degree of control over their usage. Additional servers can be up and running within minutes, if needed. AWS works with both relational databases and NoSQL.
Microsoft Azure. Microsoft offers a similar cloud solution with features that closely parallel AWS. Their databases also support NoSQL and relational databases. However, they do tend to be more expensive than AWS.
Google Cloud Databases. Google also offers hosting. However, it is only available as a cloud platform. Cloud hosting is easy-to-use, scalable, and nimble. However, because your information is only available in the cloud it is susceptible to data loss, data leakage, or even theft. Connection issues or outages could render your information inaccessible.
IBM Cloud. IBM provides database solutions that support PostgreSQL and MySQL. However, like Google, these offerings are cloud only.
FileMaker Server. For businesses utilizing FileMaker, FileMaker Server is truly the best option. It offers out of the box compatibility with FileMaker. It allows clients to open FileMaker files. Data can easily be shared with FileMaker databases and websites or other touchpoints.
Kyo Logic offers hosting solutions, and we’d be happy to walk you through these options and more. You can reach out to us here for a free consultation.
Are you looking for a better way to host your FileMaker solution? Do you spend hours trying to manage your current hosting software? Would you like an easy way to host and manage your FileMaker database so you can share all data with all users? Have you heard of FileMaker Cloud but not sure what it is?
If that’s a yes, then join Kyo Logic and Ronnie Rios at this months CT FileMaker Developers Group! Ronnie is the Senior Consulting Engineer at FileMaker and all around FileMaker Guru! On February 15th at 10 am Ronnie will show us the ins and outs of FileMakers newest product, FileMaker Cloud. FileMaker Cloud provides secure and reliable access to all your FileMaker custom apps without the knowledge and admin hassle of traditional hosting!
If you would like to learn more about FileMaker cloud hosting join us February 15th at 10 am! For more information or to register join our meetup, http://meetu.ps/35D9wN or call 203-221-3033!
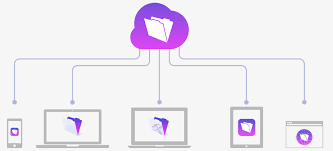
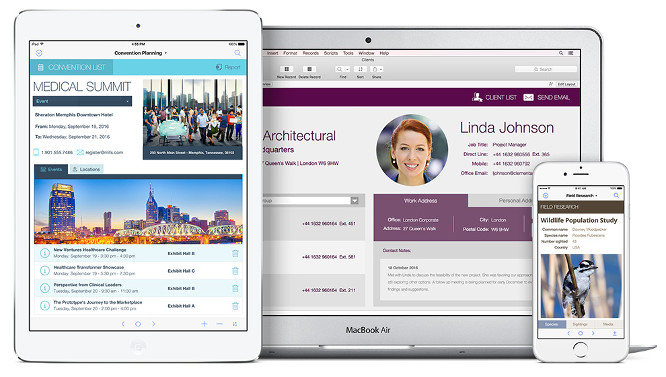
Join Kyo Logic at the Apple Store, Westfarms or Boylston Street, for an exclusive FileMaker event showcasing the new FileMaker 15 Platform. Discover how this latest platform provides stronger essentials to make custom business apps that work seamlessly across Mac, iPad, iPhone, Windows, and the web. Learn about the newest features that enhance mobility, integration, security, and performance.
The FileMaker 15 platform has been released! FileMaker 15 offers stronger essentials for making even better custom applications. FileMaker Inc. has also updated there purchasing options to better accommodate working in teams. The new features include:
Mobility
Automation & Integration
Ease of use
Security
Performance
Mobilityoffers great new options for app extensions. These features include iBeacon, Touch ID, and 3D touch support. This allows you to leverage your app with outside applications as well.
For the developers of applications, Automations & Integration, has added undo scripting and highlighted script errors in the scripting area. This allows developers to save time and avoid hassle while coding.
FileMaker Inc. has created more ease of use with updated starter solutions as well as updated user interface for FileMaker 15. They will now offer web-based help which will allow for even fast response times when needed.
Security has always been a huge concern for FileMaker so with this update even higher security standards were added. You are now able to set concealed edit boxes with ease. They have also added more SSL certifications and protective security warnings for users!
When running custom applications performance is always a focus! To keep all areas running smoothly FileMaker has added top call statistics logging and portal in-line status bars!
If you have purchased FileMaker from Kyo Logic please keep an eye out for your upgrade codes via email. If you need assistance with the upgrade or purchasing FileMaker 15 please contact Kyo Logic at your earliest convenience.
Will you be attending FileMaker’s DevCon 2016? If you have not bought tickets already you will not want to miss this great event to learn all things FileMaker!
This year Kyo logic’s Tim Neudecker will be presenting, “Don’t Host that File — Audit it First!“, Thursday July 21st at 3:45pm! For any company or IT department that will be hosting files you will not want to miss this great presentation to make sure your files are always secure!
Session Description
Before you host your brand new FileMaker custom app, you should perform a security audit. This will help you sleep at night knowing your data is safe from intruders.
In this session, we will review all aspects of file security from basic privilege sets and extended privileges to encryption at rest. We’ll also discuss server security, including physical security, proper configuration, and purchasing and installing SSL certificates.
Hi everybody, and welcome back! This time we’ll be discussing the ways that FileMaker keeps users connected to their important data.
If a user loses his network connection or the server goes down for a brief period, FileMaker automatically makes the reconnection when the server is available once again. Absolutely no data is lost in this time, and people can pick up their work right where it left off.
For the more experienced users, there is a standby server option that allows for the higher availability of crucial data. Should a primary server go down, all of the work can be switched over to a standby server simply by typing in a specific set of commands.
As always, thanks for watching, and be sure to check back here again soon for more helpful FileMaker tips!
We use cookies to ensure that we give you the best experience on our website. If you continue to use this site we will assume that you are happy with it.