Custom Import Tool: let anyone import spreadsheets into FileMaker without breaking data

Free FileMaker add-on

Custom Import Tool: let anyone import spreadsheets into FileMaker without breaking data

Friendly column labels, saved templates, and a preview step before anything touches your real records.

You can give everyday users a safe, flexible way to import spreadsheets into FileMaker without exposing your database structure. Kyo Logic’s free Custom Import Tool add-on maps friendly column labels to real fields, saves reusable import templates, and loads every file into a staging table first, so users can preview and fix the data before it reaches your real records.

Here is the moment it exists for. Every Monday, purchasing imports a vendor price sheet. This week the vendor added a column and moved “Unit Cost” two places to the right. The pre-mapped import script does not notice. Four hundred items now show a freight charge as their cost, and nobody finds out until a quote goes out wrong.

Why are FileMaker imports hard for everyday users?

Most FileMaker systems offer one of two import paths, and neither is ideal for a non-technical user.

  • A pre-mapped import script is simple, but rigid. If a column is renamed or reordered, it breaks or quietly puts data in the wrong field.
  • FileMaker’s built-in import dialog is flexible, but it shows users back-end field names, table structure, and naming conventions they should not need to understand.

Real files make it worse. Columns get renamed. Extra columns appear. Some rows should be skipped. One column holds two pieces of data. A user should not have to call a developer because a spreadsheet has one extra column.

What the add-on does out of the box

The Custom Import Tool sits in the middle. A full-access user defines friendly header options once, so an end user sees “Customer Email” instead of a field name like Customer::cust_primary_email. From there the workflow looks like this:

A full-access user maps friendly header labels to real FileMaker fields

↓

The incoming file is imported into a staging table

↓

An end user selects or creates an import template

↓

The user chooses which columns to import and which to skip

↓

The user previews, edits, and fixes the staged data

↓

The final import script moves the staged data into the right FileMaker table

Out of the box the tool supports up to 20 columns, and more can be added if you need them.

Templates that bend without breaking

If a vendor, customer, department, or outside system sends files in a consistent format, users save that structure as a template and reuse it. When a file arrives a little different, they adjust the column order or mark a column to skip. If the change is temporary, they make a one-time adjustment without changing the saved template.

Preview before you commit

A bad import straight into production can create duplicates, overwrite good values, or put information in the wrong fields. Staging the data first gives users a safe place to look. Skipped rows and skipped columns are highlighted, and the staging table is open for edits, so users can clean up values or remove rows before the final step.

Create and update records in one import

With match fields configured, one import can update records that already exist and create new ones where no match is found. That is useful for customer lists, inventory counts, product catalogs, order updates, and membership lists, where some rows are new and some are changes.

Ideas for how to use it

  • Vendor price sheets: one template per vendor, adjusted when a vendor changes its format.
  • Inventory counts: stage the counts, review the differences, then update.
  • Customer and prospect lists: match on email or account number, update the rest.
  • Order data from outside systems: map their column names to your fields once.
  • Cleanup before go-live: review and correct legacy data before it reaches the new system.

Developers can extend it with scripting, for example splitting a single “Full Name” column into first and last name, or parsing a combined address into street, city, state, and ZIP. Once data is in, the Audit Log & Version History add-on can record what changed afterward, and the Data File script steps handle the export side.

What this could look like in your solution

For most teams, the first template is the import someone dreads every week. Once that one runs from a template with a preview step, the developer stops getting calls about it, and the person running it stops worrying about it. Messy data is often the real problem behind unreliable reports, and controlled imports are one of the cheapest places to stop it at the door.

Kyo Logic builds custom Claris FileMaker and manufacturing software for businesses across New England and beyond. If you want help setting up match logic, building parsing rules for a difficult file, or deciding which recurring imports to template first, reach out.

Frequently asked questions

How do I let users import data into FileMaker without seeing field names?

Map friendly column labels to real fields ahead of time. The Custom Import Tool lets a full-access user define those labels so end users choose names like Customer Email instead of back-end field names.

Can I preview an import before it changes my records?

Yes. The tool imports the file into a staging table first. Users can review, edit, and skip rows or columns, and skipped items are highlighted, before the final import runs.

Can one import create new records and update existing ones?

Yes. With match fields configured, the import updates records that already exist and creates new records where no match is found.

How many columns does the Custom Import Tool support?

Up to 20 columns out of the box, with the option to add more if needed.

Quick takeaways

  • List the imports your team runs every week and template the most painful one first.
  • Use a staging step for any import that touches records people rely on.
  • Pick a reliable match field, such as an account number or email, before you allow updates.
  • Download the add-on and run one real file through staging to see what it catches.

Get the Custom Import Tool add-on

Tell us where to send it and we will email your download link right away.

Key Considerations for Setting Up Local LLMs for Claris FileMaker

Running large language models on your own systems can be a good choice for FileMaker teams that want more control over privacy, infrastructure, and their long-term AI setup. With a local deployment, you do not have to send prompts or business data to outside providers. Instead, you can handle embedding generation, text generation, query generation, and retrieval-augmented generation (RAG) within your own environment.

However, having this control also brings some challenges. Setting up local LLM infrastructure is not a simple add-on for most teams. If you are considering using it with Claris FileMaker, here are some important factors to keep in mind before you begin.


Understand what “local” actually needs to support

A local AI model server isn’t just responsible for chat responses. Depending on your architecture, it may manage several distinct workloads:

  • Text generation
  • Query generation
  • Embedding generation
  • Retrieval-augmented generation (RAG)

Embedding generation and RAG add additional tasks for your AI system. Rather than merely creating responses, the system might need to convert source content into vector embeddings, store or search those embeddings, identify the appropriate context, and then deliver a well-supported answer. This requires more computing power and increases the chances of slowdowns or errors.

Therefore, when you move beyond simple prompt-and-response tasks, you are not just running a model on your system: you are managing a full AI service layer.


Separate the AI Server from FileMaker Server

A critical requirement is to keep your AI Server separate from your FileMaker Server.

There are several reasons why this separation is vital. First, LLM and embedding tasks can consume substantial resources and may be unpredictable, especially with multiple users. If these processes compete with FileMaker Server for CPU, memory, or disk space, your main application could slow down or even crash.

Second, separating the AI layer simplifies scaling and troubleshooting. If the model server requires more GPU, memory, or adjustments, you can implement those changes without affecting your primary FileMaker environment. Additionally, if the AI service encounters issues or needs maintenance, it won’t bring down your entire system.

For most real-world deployments, treating the AI layer as an independent service rather than just an add-on to your database server is advisable.


Plan for significantly more infrastructure than expected

Many assume a local LLM setup will operate efficiently on basic hardware, but our testing shows this isn’t true once embedding generation and RAG come into play.

These tasks demand substantial processing power. The smallest server that reliably handled our workload included:

  • 4 NVIDIA T4 GPUs
  • 48 vCPUs
  • 192 Gb of memory

This is considerably more than most FileMaker teams anticipate when thinking about ‘local AI.’ Planning your infrastructure early is crucial, especially before your team begins building features requiring local inference.

If you plan to implement features such as semantic search, knowledge retrieval, internal document Q&A, or other RAG-based tasks, hardware sizing must be considered up front. This decision is essential for assessing project feasibility.


Do not underestimate hosting costs

Hosting your AI locally may reduce reliance on external vendors, but it doesn’t necessarily save money. Based on the server profile above, AWS hosting costs were about $3,000 per month during our tests. This figure alone should prompt serious business discussions.

For some organizations, privacy, control, and compliance benefits justify the expense. For others, a managed model provider might still be the preferred choice.

The key question isn’t whether local hosting is cheaper than API calls; it’s which cost structure aligns best with your usage, risk appetite, and technical capabilities.


Think beyond setup; focus on operations

Establishing a local model server is only the initial step. To be truly ready for operational use, you must also consider:

  • Monitoring and alerting
  • Model lifecycle management
  • Capacity planning
  • Security hardening
  • Backup and recovery strategies
  • Update procedures for embeddings, source documents, and retrieval pipelines

This is particularly critical if your FileMaker users depend on the system for essential business tasks. A setup that works smoothly in testing but is difficult to maintain in production can become more of a hindrance than a help.

The new admin console capabilities significantly simplify deployment, making it easier for teams to experiment and set up initial configurations. However, ease of setup doesn’t equate to reduced complexity overall. While the interface streamlines deployment, infrastructure needs, especially for embeddings and RAG, still require careful planning.


In practice, the admin console enables quicker proof-of-concept development, but careful planning for performance, service separation, and overall cost remains essential.


Conclusion

Local LLMs for Claris FileMaker are an excellent option if privacy, control, or internal knowledge workflows are priorities. They allow you to handle embedding, text, query generation, and retrieval-augmented tasks without transmitting sensitive data externally.

However, operating these systems isn’t straightforward. Once embedding and RAG workflows are involved, more powerful hardware, higher operational costs, and clear separation between the AI Server and FileMaker Server are necessary.

For teams considering this approach, the critical question isn’t just “Can we run local models?” but “Do we have the right technical, financial, and operational setup to manage them effectively?”

How to Connect FileMaker Data to Claris Studio Safely and Design Around Sync Limits

Claris Studio is more useful when you stop treating it like a separate island

A key change in the Claris platform is that Claris Studio now connects directly to FileMaker data sources, including FileMaker Cloud. This makes it practical to extend FileMaker workflows to the web without duplicating your data in another system. However, not every FileMaker table should be shared with Studio, and you cannot ignore the sync model. Claris provides clear guidelines on sync behavior, offline scenarios, and scalability. So, instead of asking, “How do I connect FileMaker to Studio?” it is better to ask, “Which data should I connect, and under what rules?”

The strongest Studio use cases typically involve an operational slice of your FileMaker system rather than the entire database.

Good candidates tend to be datasets like:

  • Open service requests
  • Approval queues
  • Project summaries
  • Order exceptions
  • Active work assignments
  • Current operational dashboards

These work well because they are current, bounded, and easy to present through Studio views. Claris notes that up to 250,000 records can be imported from FileMaker data sources at a time, but changes to tables larger than that will not sync. That alone is a good reason to avoid aiming Studio at every historical record you own. r as the source of truth

If you are connecting FileMaker data to Studio, the safest architectural assumption is that FileMaker remains the authoritative system.

That means core business rules, transactional logic, audit-sensitive changes, and exception handling should continue to live primarily in FileMaker. Studio is best used as a web-facing interaction and visibility layer on top of that source data. This fits how Claris describes Studio overall: a cloud environment for creating rich web experiences while keeping the same data available to FileMaker apps for reading and writing. Simple: if a change has financial, legal, or cross-record consequences, keep the enforcement in FileMaker.

Build around operational slices, not raw table dumps

A common mistake is to connect a large table and assume the Studio view will sort itself out later.

A better pattern is to decide first what the Studio experience is for, then expose the FileMaker data needed for that slice. For example:

  • A manager dashboard showing only open items
  • A field team workspace showing only assigned records
  • An exception desk showing only unresolved issues
  • An executive rollup showing only the summarized current activity

This usually leads to a cleaner experience and a safer sync model. It also makes it easier to stay within the practical record limits Claris documents for FileMaker-connected tables in Studio. ut offline and restart scenarios

This is the part many blog posts skip, but it is one of the most important implementation details.

Claris documents that if a FileMaker Server host used for a Studio data source is restarted or temporarily disconnected, and records are edited in both Claris Studio and FileMaker while the host is offline, recent changes can be lost.

FileMaker takes precedence, so Studio-side edits made during the outage can be overwritten once the host comes back online and data sync resumes. implications:

  • Avoid treating Studio as the place for high-risk concurrent edits on sensitive records
  • Be careful with workflows where many users may edit the same record from both sides
  • think twice before exposing fast-moving, heavily edited tables without a clear ownership model

If the workflow is concurrency-heavy, that is a warning sign to keep the critical edit surface in FileMaker.

Use derived fields to make Studio views cleaner

Studio becomes much more effective when it is not forced to infer operational meaning from raw fields alone.

It often helps to expose FileMaker-calculated or script-maintained fields, such as:

  • priority band
  • SLA status
  • aging bucket
  • owner display name
  • open versus resolved flag
  • escalation status
  • last action timestamp

These make Studio views easier to build and easier for users to interpret. They also keep business meaning closer to the FileMaker source, where it is easier to govern.

Pick the Studio view based on the job

Once the data source is connected, the next design decision is the view.

Claris Studio supports several view types, including spreadsheet, form, list-detail, kanban, and more. Those should not be chosen based on aesthetics. They should be chosen based on the kind of work a user needs to do.

  • A list-detail view is strong for one-record-at-a-time review.
  • A kanban view is strong for a stage-based workflow.
  • A dashboard is strong for bottlenecks and summaries.

The goal is not to rebuild your entire FileMaker layout in Studio. Instead, focus on creating a targeted workspace.

A practical implementation pattern

A safe first pattern looks like this:

FileMaker

– source tables

– business rules

– calculated helper fields

– scripts for critical actions

       ↓

Connected FileMaker data source in Claris Studio

       ↓

Studio views

– manager dashboard

– triage spreadsheet

– reviewer list-detail

       ↓

Optional hubs for audience-specific sharing

This approach keeps your main system stable while allowing you to add simple web-based features.

Where this approach fits best

Connecting FileMaker data to Studio is especially useful when:

  • You need a modern web-facing workspace quickly
  • Different audiences need different views of the same current data
  • The process is operational rather than deeply transactional
  • The value comes from visibility, filtering, lightweight edits, or coordination

It is less attractive when:

  • The dataset is extremely large and broad
  • The workflow depends on heavy concurrent editing
  • Complex transactional logic must run at the point of interaction
  • The Studio surface would become a second full application instead of a focused view

A better way to think about it

The safest and most useful Studio pattern is not “put FileMaker on the web.”

It is about choosing the part of your FileMaker data that benefits from a simpler web workspace, and then designing with the sync model in mind.

This makes Studio more practical and reduces the chance of hidden problems.


Why Do Small Production Issues Turn Into Big Delays?

In manufacturing, small issues are unavoidable.

A machine goes down for a short period. A material is not where it is supposed to be. A specification needs clarification. A quality check takes longer than expected. A team member makes a judgment call to keep work moving.

On their own, these problems may seem minor. The real challenge is what happens next.

In many production environments, small issues turn into big delays because workflows and dependencies are not clearly systemized. One job depends on another. One department needs information from someone upstream. One approval affects purchasing, scheduling, production, quality control, and shipping. But when those relationships live in spreadsheets, email threads, whiteboards, or individual employee knowledge, it becomes very difficult to see the ripple effect.

A small issue may be handled locally, but the broader impact is not communicated quickly enough. Production keeps moving based on an outdated schedule. Inventory is allocated to the wrong job. A downstream team waits without realizing the previous step has stalled. Customer service does not know an order is at risk until the delivery date is already in question.

The delay rarely comes from the original issue alone. It comes from the lack of visibility into what that issue affects.

This is where manufacturers often feel stuck. Everyone is working hard. Supervisors are solving problems in real time. Employees are making adjustments to keep jobs moving. But because there is no centralized system connecting workflows, updates, dependencies, and exceptions, the business reacts later than it should.

That reaction time is expensive.

A minor production issue can create overtime, missed ship dates, rush purchasing, rescheduled work, frustrated customers, and unnecessary internal pressure. The team may eventually solve the problem, but only after it has created a much larger operational disruption.

A stronger system gives manufacturers a clearer way to manage these dependencies. When production steps, job statuses, material requirements, approvals, and quality checkpoints are connected, small issues can be flagged before they cascade. Teams can see what is blocked, what is at risk, and what needs to happen next.

Claris FileMaker is especially valuable in this kind of environment because it can be customized around the way a manufacturer actually operates. Instead of forcing the business into a generic workflow, Claris FileMaker can support the specific steps, handoffs, rules, exceptions, and reporting needs that define day-to-day production.

That may include alerts when a job falls behind schedule, dashboards that show blocked work, records that connect production issues to affected orders, or workflows that route approvals and updates to the right people automatically.

The goal is not to eliminate every small issue. That is not realistic. The goal is to prevent small issues from becoming invisible, disconnected, or unresolved until they create larger delays.

When production workflows are systemized, teams can respond earlier, communicate more clearly, and make better decisions across the entire operation. Small problems still happen, but they do not have to derail the business.

Interested to learn more about how FileMaker can solve for production delays? Reach out to Kyo Logic here.


How to Build a Web Intake Workflow with Claris Studio, FileMaker, and Claris Connect

Teams often ask for “an online form,” but that usually isn’t what they truly need.

What they really need is a workflow that collects information, checks it, sends it to the right place, adds details, updates records, and shows the current status to the right people.

This is why Claris Studio stands out when you see it as more than just a web form tool. You can share Studio forms with your team or anyone who has the link. Claris presents Studio as a platform for collecting, viewing, and analyzing data, which can also be used in custom apps.

For many implementations, the strongest pattern is:

  • Studio for capture
  • FileMaker for business logic and system-of-record behavior
  • Connect for orchestration and cross-system flow

A practical use case: vendor onboarding intake

Vendor onboarding is a good example because it has all the right ingredients:

  • external submission
  • inconsistent source data
  • duplicate risk
  • internal review
  • approvals
  • status tracking
  • follow-up tasks

That makes it better than a trivial demo.

The target architecture

Here is the core pattern:

External submitter

   ↓

Claris Studio form

   ↓

Claris Connect flow

   ↓

FileMaker

– validation

– dedupe

– vendor creation or update

– review tasks

– status management

   ↓

Claris Studio views/hubs

– intake queue

– review queue

– status visibility

This setup works well because Studio is great for easy, web-based data capture, while FileMaker is better for handling records and enforcing processes. Connect links the two when you need to move, change, or automate data.

Two valid data ownership models

Before building anything, decide where the real record begins.

Model 1: FileMaker-first
The Studio form writes into a FileMaker-connected data source, and FileMaker is the source of truth from the start.

Model 2: Studio-first, then promoted to FileMaker
The Studio form creates a Studio-side record first, and Connect later transforms that submission into operational records in FileMaker.

Both models can work. However, if your workflow involves important business data like vendors, clients, orders, or compliance records, starting with FileMaker is usually the safer choice for the long term.

Why Connect should be treated carefully

Claris Connect can be useful here, but the boundaries matter.

The Claris FileMaker connector works with hosted FileMaker apps and requires at least FileMaker Cloud or FileMaker Server 21.1.0. Claris also points out that the connector does not yet support direct access to Claris Studio tables. So, you should not expect one connector to handle every type of data in the same way.

Claris also documents that when working with FileMaker through Connect, the target app must have both Data API and OData privileges enabled, and those services must also be enabled on the host.

Details like this are important to highlight in a real implementation guide.

Design the schema before the form

A common mistake is building the intake form first and only later figuring out how the data fits into the system.

It’s better to define the operational schema before anything else. For a vendor onboarding workflow, a basic structure might be:

Intake_Request

– RequestUUID

– SubmittedAt

– SubmittedByName

– SubmittedByEmail

– CompanyNameRaw

– TaxIDRaw

– RequestType

– RawPayloadJSON

– ProcessingStatus

– ProcessingError

– RelatedVendorUUID


Vendor

– VendorUUID

– LegalName

– NormalizedTaxID

– PrimaryEmail

– Status

– CreatedAt


VendorContact

– ContactUUID

– VendorUUID

– FullName

– Email

– Phone


ReviewTask

– TaskUUID

– RequestUUID

– AssignedTo

– TaskType

– TaskStatus

– DueDate


StatusHistory

– HistoryUUID

– RequestUUID

– OldStatus

– NewStatus

– ChangedAt

– ChangedBy

Two fields here matter more than they may seem:

RawPayloadJSON gives you an audit-safe copy of exactly what came in.

ProcessingStatus and ProcessingError help you track the workflow, which is important when something goes wrong.

Build the Studio form for clean capture, not maximum data collection

Once you have the schema, designing the form gets easier.

A good intake form doesn’t try to gather every detail. It collects just enough clean information to start the process, leaving space to add more details later if needed.

That usually means:

  • Prefer controlled values over free text where possible
  • Separate public-facing labels from internal field naming
  • Avoid exposing operational fields on the intake form
  • Collect enough to deduplicate and route, not enough to re-create the entire back office

Studio forms can be shared broadly, including with anonymous users via a link, which is why form discipline matters.

A useful Connect flow pattern

Here is the shape of a practical flow:

Trigger: New intake record created

   ↓

Validate required fields

   ↓

Normalize values

– trim whitespace

– normalize email case

– strip punctuation from tax ID

   ↓

Check for existing vendor

   ↓

If vendor exists:

   update/attach to existing

Else:

   Create new vendor

   Create primary contact

   Create review task

   ↓

Write result back to intake record

– processed

– needs review

– duplicate found

– error

The real technical value isn’t in the visual flow, but in clearly separating each step.

Validation is not the same as normalization.
Normalization is not the same as deduplication.
Deduplication is not the same as approval.

The clearer you make these boundaries, the more reliable your workflow will be.

A FileMaker script parameter pattern worth using

When Connect or another process hands work to FileMaker, JSON parameters are usually cleaner than trying to overload single text parameters.

For example:

{

 “requestUUID”: “2C8A0A6E-85A3-4C3C-A8C0-41F9A88D4E10”,

 “submittedByEmail”: “ap@vendorco.com”,

 “requestType”: “New Vendor”,

 “source”: “Claris Studio”

}

Then the receiving FileMaker script can parse predictably:

Set Variable [ $requestUUID ; JSONGetElement ( Get ( ScriptParameter ) ; “requestUUID” ) ]

Set Variable [ $email       ; JSONGetElement ( Get ( ScriptParameter ) ; “submittedByEmail” ) ]

Set Variable [ $type        ; JSONGetElement ( Get ( ScriptParameter ) ; “requestType” ) ]

Set Variable [ $source      ; JSONGetElement ( Get ( ScriptParameter ) ; “source” ) ]

This isn’t advanced code, but it’s a reliable habit for implementation.

A dedupe pattern that is better than exact-match thinking

Relying only on exact matches is rarely enough for intake workflows.

A more useful pattern is to check some combination of:

  • normalized company name
  • normalized tax ID
  • primary email domain
  • known aliases or alternate names

This approach helps you handle different outcomes more effectively:

  • exact match, attach to existing
  • probable match, send to review
  • no meaningful match, create new

This is where FileMaker really proves its value. When cross-record logic is important, it’s best to keep the decision-making in the FileMaker app.

Make the workflow idempotent

This is one of the most practical lessons to include because many “working” intake flows fail here.

Never assume a submission is processed exactly once.

A safer design includes:

  • a stable external submission identifier
  • a processed timestamp
  • a processing status field
  • a retry-safe script or flow path
  • duplicate detection for the intake record itself

That way, if a flow retries or a user resubmits, the system can recognize the event without creating a mess.

Status visibility matters almost as much as capture

Once the workflow runs, Studio becomes useful again as the visibility layer.

You can create views or hubs that show:

  • Unprocessed intake
  • Duplicate review queue
  • Vendor setup in progress
  • Awaiting approval
  • Completed onboarding

That creates a much better operational surface than an email chain or a spreadsheet export.

Security and access notes

If you are using Connect with FileMaker, Claris documents that both Data API and OData access must be enabled appropriately. OData is a REST-based standard for querying and updating hosted FileMaker data, and the general OData workflow includes finding and modifying records, as well as running FileMaker scripts via API calls.

That does not mean every intake workflow should become an API-heavy project. It means your architecture should be intentional about privileges and integration points.

Closing thought

The right way to frame a Studio intake project is not, “How do we put a form on the web?”

It is, “How do we build a reliable intake pipeline?”

Studio gives you a clean web-facing start.

FileMaker gives you durable logic and operational control.

Connect gives you orchestration when the workflow needs to move, transform, or notify.

That is the version readers can actually implement.


Can Your FileMaker Do This? Add a ChatGPT/Claude Co-Pilot to FileMaker via MCP Protocol.

Most teams assume “AI in FileMaker” means building a custom chat UI, wiring a bunch of APIs, and taking on a maintenance burden. With Model Context Protocol (MCP), you can flip that: use Claude as the interface, and expose a controlled set of FileMaker tools (tables, scripts, and actions) through Claris MCP.

What this looks like in practice

  • Calendar invites from records: “Create invites for next week’s site visits and include the customer address and scope,” then FileMaker generates the .ics details and logs it back to the record.
  • Data hygiene on demand: “Find duplicates created this month and propose merges,” then FileMaker runs your cleanup scripts and returns a review list for approval.
  • Planning and analysis without hunting: “Summarize last year’s customer trends and churn signals,” then the copilot pulls the right data and produces a narrative summary that links back to the underlying records.
  • Offline team catch-up: “What changed while the field team was offline?” The copilot then summarizes sync deltas and flags conflicts for review.

How it works

  1. You define a small set of “approved” scripts, such as CreateInvite, RunDataHygieneCheck, GenerateCustomerSummary, or BuildProductionPlanSnapshot.
  2. Claris MCP exposes only those tools, with permissions and scope you control.
  3. Claude calls those tools via MCP and returns results in plain English, optionally writing back to FileMaker through the scripts you allow.

Why it matters

  • Less time navigating layouts and rebuilding the same reports.
  • Faster follow-through, because the “answer” can include the next action (create invite, open task, generate summary) with an audit trail.
  • Low-risk rollout, because you can start read-only, restrict which scripts are callable, and log every request and response.

If you want a simple pilot, think through a single workflow that’s repeatable every week (consider: calendar coordination, duplicate cleanup, or executive summaries). Start by wiring up one or two approved scripts through MCP and prove value quickly, without changing your core system.

Need help? Don’t hesitate to contact us!

Why Does Inventory Always Feel “Off” Even When It’s Tracked?

Many manufacturers technically track inventory. Materials are entered into spreadsheets. Stock counts are updated. Adjustments are made. Reports are generated.

And yet, inventory still feels unreliable.

The number in the system says one thing. The shelf says another. A team member remembers using material on a rush job, but that usage was not recorded right away. Someone made a manual adjustment, but no one knows why. Purchasing thinks there is enough stock. Production finds out there is not.

This is one of the most common signs that inventory tracking exists, but inventory control does not.

The issue is usually fragmentation. Inventory data may live across spreadsheets, accounting systems, production schedules, warehouse notes, purchase orders, and employee knowledge. Each source may be useful on its own, but none of them gives the full picture. When updates are delayed or manually reconciled later, the business is always working with information that is slightly behind reality.

That lag creates uncertainty. Teams over-order because they do not trust the numbers. Or they under-order because a spreadsheet looks current when it is not. Jobs get delayed because materials are missing. Excess stock takes up space and cash. Leadership struggles to understand whether the problem is purchasing, production, receiving, usage tracking, or reporting.

In many cases, the team is not doing anything wrong. They are simply trying to manage a moving target with tools that were not designed for real-time inventory visibility.

A better system connects inventory activity directly to the workflows that affect it. Receiving, production usage, job costing, transfers, adjustments, and reorder points should not be managed as separate manual steps. They should feed into a shared view of what is available, what is committed, what is incoming, and what needs attention.

Claris FileMaker can help manufacturers build that kind of system around their actual operations. Instead of relying on disconnected spreadsheets or generic inventory tools, a custom Claris FileMaker solution can reflect the specific materials, locations, production steps, approval processes, and reporting needs of the business.

That means inventory becomes more than a number someone updates after the fact. It becomes a live operational resource.

When inventory always feels “off,” the real problem is often not the count itself. It is the delay between what happens in the business and when the system reflects it. Closing that gap gives teams more confidence, fewer surprises, and a clearer path to better planning.

Interested to learn more about how FileMaker can solve for inventory uncertainty? Reach out to Kyo Logic here.


A Better Way to Extend FileMaker: Build Role-Based Workspaces with Claris Studio Hubs

The old pattern works until it doesn’t

A lot of FileMaker systems start from a sensible place: one app, one schema, one interface, one source of truth. That works well when the audience is small and the process is mostly internal.

The friction starts when the same system must serve coordinators, managers, field staff, executives, and sometimes external participants. At that point, one large interface usually becomes a compromise. Some users see too much. Some see the wrong things. Some need only one narrow slice of the process, but still have to live inside a broader application built for someone else.

That is the mindset shift Claris Studio makes worth considering. In Claris Studio, a view is a way to present and work with data, and a hub is a collection of views shared with a specific audience. Studio supports multiple view types, including spreadsheet, form, list-detail, kanban, dashboard, list, gallery, timeline, and calendar.

A better mental model: one process, many surfaces

Instead of asking, “How do we make one FileMaker UI work for everyone?”, a better question is, “What surfaces does each role actually need?”

That leads to a cleaner architecture:

  • FileMaker remains the source of truth for core tables, relationships, calculations, scripts, and deeper business logic.
  • Claris Studio provides narrower, role-based workspaces built on top of the same operational data.
  • Hubs package those workspaces by audience, function, or responsibility.

This is not about replacing FileMaker. It is about reducing interface sprawl.

Where hubs fit particularly well

Hubs are a strong fit when a single process serves multiple audiences with different roles.

Think about a service operations workflow:

  • Coordinators need an intake queue and assignment surface
  • Field staff need only their work, dates, notes, and status updates
  • Managers need bottleneck visibility and SLA risk
  • Executives need roll-up reporting and trend snapshots

Those are not four versions of the same user. They are four different work contexts. Hubs let you reflect that reality.

A reference architecture

The simplest useful pattern looks like this:

[Users by role]

 Coordinators

 Field staff

 Managers

 Executives

       ↓

Claris Studio Hubs

 Intake Hub

 Field Work Hub

 Manager Hub

 Executive Hub

       ↓

FileMaker data source

       ↓

FileMaker application

 Requests

 Tasks

 Assignments

 Status history

 Business rules

 Scripts

 Notifications

Claris Studio can connect directly to FileMaker-hosted data sources, and once connected, FileMaker data can be used in Studio much like native Studio tables. That makes this architecture much more practical than it would have been if Studio had been thought of mainly as a separate form layer.

Start with the schema, not the screens

This is the part many teams skip.

If you want role-based workspaces to behave well, the underlying data model must support multiple audiences cleanly. That usually means separating operational entities more deliberately.

A common pattern would be:

Requests

– RequestUUID

– RequestType

– SubmittedBy

– Priority

– CurrentStatus

– OwnerID

– DueDate

– CreatedAt

– UpdatedAt

Tasks

– TaskUUID

– RequestUUID

– AssignedTo

– TaskType

– TaskStatus

– TaskDueDate

Assignments

– AssignmentUUID

– RequestUUID

– UserID

– RoleOnRecord

StatusHistory

– HistoryUUID

– RequestUUID

– OldStatus

– NewStatus

– ChangedBy

– ChangedAt

Users

– UserID

– Name

– Role

– Team

The important principle is simple: do not build your model around one screen. Build it around the process and its actors.

Match each role to the right view type

This is where Studio becomes useful in a very practical way.

A coordinator often needs a spreadsheet view because they are triaging, sorting, filtering, and making many small decisions quickly.

A manager often benefits from kanban or dashboard views because they are watching movement, backlog, and stalled work.

A field user may need list-detail or calendar because they care about only their assigned items and their due dates.

An executive typically needs summary views, not workflow-heavy surfaces.

Studio’s multiple view types matter because they let you express the same data differently without redesigning the core system every time.

What should stay in FileMaker

This is where many modernization projects go wrong. Once a web-facing surface becomes easier to build, people start pushing too much logic into the presentation layer.

A safer rule is:

Keep business logic in FileMaker when the action depends on cross-record validation, transactional behavior, privilege-sensitive updates, or exception handling.

That means things like these still belong primarily in FileMaker:

  • Status transition rules
  • Assignment logic
  • Escalation triggers
  • Deduplication
  • Creation of related records
  • Audit history generation
  • Downstream integrations

Studio should usually be the place where users see, filter, update, and collaborate. FileMaker should remain the place where the process is enforced.

A simple FileMaker example

Here is the kind of script logic that fits well in FileMaker, even if the user interaction starts in Studio.

Script: Apply Request Status Change

Set Variable [ $requestUUID ; JSONGetElement ( Get ( ScriptParameter ) ; “requestUUID” ) ]

Set Variable [ $newStatus   ; JSONGetElement ( Get ( ScriptParameter ) ; “newStatus” ) ]

Set Variable [ $userID      ; JSONGetElement ( Get ( ScriptParameter ) ; “userID” ) ]

Go to Layout [ “Requests” ]

Enter Find Mode [ Pause: Off ]

Set Field [ Requests::RequestUUID ; $requestUUID ]

Perform Find

If [ Get ( FoundCount ) = 1 ]

   If [ not IsValidStatusTransition ( Requests::CurrentStatus ; $newStatus ) ]

       Exit Script [ Text Result: “Invalid status transition” ]

   End If

   Set Field [ Requests::CurrentStatus ; $newStatus ]

   Set Field [ Requests::UpdatedAt ; Get ( CurrentTimestamp ) ]

   New Record/Request

   Set Field [ StatusHistory::RequestUUID ; $requestUUID ]

   Set Field [ StatusHistory::OldStatus ; Requests::CurrentStatus ]

   Set Field [ StatusHistory::NewStatus ; $newStatus ]

   Set Field [ StatusHistory::ChangedBy ; $userID ]

   Set Field [ StatusHistory::ChangedAt ; Get ( CurrentTimestamp ) ]

End If

The exact implementation will vary, but the architectural point is stable: keep the rules centralized.

Design hubs around work, not departments

A subtle mistake is to mirror the org chart too literally.

Sometimes the right hub is by department. Sometimes it is by phase of work, such as intake, review, fulfillment, and reporting. Sometimes it is by responsibility, such as my queue, approvals, escalations, and executive summary.

The strongest hub structures usually follow how decisions are made, not how the company draws its boxes.

Watch the sync and scale boundary

FileMaker-connected tables in Studio can import up to 250,000 records at a time. Claris also notes that changes or updates to tables with more than 250,000 records will not sync. That does not make Studio a bad fit, but it does mean this pattern is strongest when you expose the operational slice that matters, not every historical record in the system.

Claris also notes a practical sync concern: if the FileMaker host is temporarily offline, edits made in Studio while disconnected can later be overwritten when FileMaker comes back and takes precedence during sync.

That means you should be careful with heavily edited, large-scale, highly concurrent datasets.

Where this architecture shines

This pattern is especially strong when:

  • One core process serves several audiences
  • Some users need a lighter web experience
  • The FileMaker app has grown into a broad operational tool
  • Adoption is suffering because the interface is too wide for the job

It is less compelling when:

  • Every user truly needs the same deep interface
  • The workflow is mostly transactional and dense
  • The process depends on complex UI behavior that belongs inside FileMaker

Closing thought

The interesting opportunity with Claris Studio hubs is not that they give FileMaker a prettier front end. It is that they encourage better architectural discipline.

One process does not need one interface.

If your FileMaker system serves multiple audiences through a single broad UI, hubs are worth evaluating to split the experience without splitting the source of truth. 

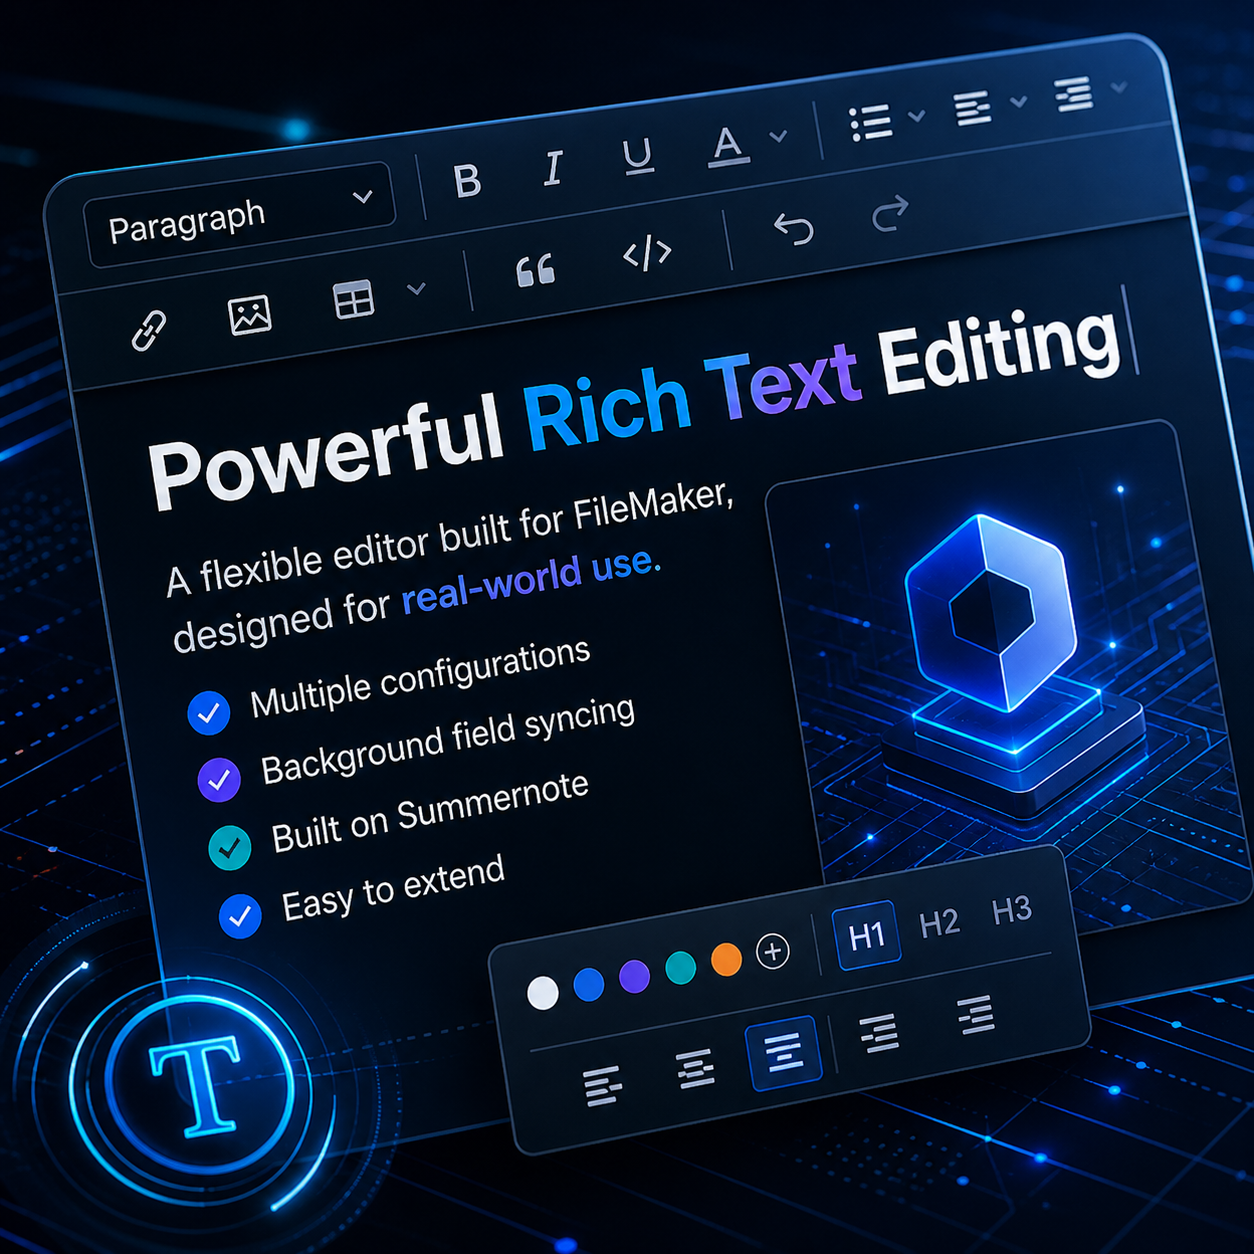
Rich Text Editor: a reusable formatting toolbar for any FileMaker field

Free FileMaker add-on

Rich Text Editor: a reusable formatting toolbar for any FileMaker field

Give users a familiar editor for notes, templates, and client-facing text, and set it up once for as many fields as you need.

You can add a full rich text editor to FileMaker with a web viewer, and you only need to build it once. Kyo Logic’s free Rich Text Editor add-on runs the Summernote editor inside a web viewer, lets you set up as many separate configurations as you need, and writes changes back to the connected FileMaker field as the user types.

Here is the moment it exists for. Your team writes the scope section of every quote in FileMaker. Someone needs a bulleted list, a bold warning, and a link to the spec sheet. They write it in Word, paste it in, and the formatting falls apart. Next week a different screen needs a stripped-down notes editor, and a developer starts building a second editor from scratch.

Why does rich text get complicated in FileMaker?

FileMaker text fields support basic character styling from the Format menu, but users now expect a toolbar: lists, headings, links, and the buttons they know from every web app. Embedding one editor in a web viewer is a reasonable afternoon of work.

The hard part is the second and third editor. One screen needs three buttons. Another needs the full set for templates and documentation. Each new editor usually means new scripts and new plumbing between the web viewer and the field. That is the part this add-on was built to remove.

What the add-on does out of the box

  • Built on Summernote. Summernote is a well-documented open source editor, so its options and behaviors are clearly defined, and it is simple enough that configuration changes stay easy.
  • Many configurations, one component. Create as many standalone configurations as you need, each pointing to a different field. Keep one minimal and give another the full toolbar.
  • The FileMaker communication is already handled. The link between the editor and FileMaker is abstracted out, so adding a configuration does not mean writing new scripts or field-level plumbing.
  • Background saves. The editor updates the connected field as the user types.

You create a configuration and point it at a field

↓

You choose the toolbar options that screen needs

↓

A user opens the layout and edits in a familiar toolbar

↓

The editor writes the content back to the field in the background

Why a repeatable pattern beats a one-off editor

The value is not rich text on one screen. It is having a pattern you can reuse every time a new use case appears, without starting over. A quote template, a product description, a client update, and an internal procedure can each get the editor they need from the same component.

Because Summernote has a fairly extensive API, there is room to go further when a solution needs more than the default setup. And if you are already improving the screens your team writes on, the Multi-File Uploader handles the attachments that usually sit next to that text, and the Audit Log & Version History add-on records who changed it.

What this could look like in your solution

Start with the field people complain about most. Usually that is the one where formatted text matters to a customer: quote scopes, job instructions, or report narratives. Give it the full toolbar. Then give internal notes a lighter version so nobody is distracted by buttons they never use.

Kyo Logic builds custom Claris FileMaker and manufacturing software for businesses across New England and beyond. If you want help deciding which fields deserve rich text, keeping formatted content consistent in printed and emailed output, or extending the editor with Summernote’s API, reach out.

Frequently asked questions

Does FileMaker have a built-in rich text editor?

FileMaker text fields support basic character styling from the Format menu, but there is no built-in toolbar editor with lists, headings, and links. A web viewer editor such as Summernote fills that gap.

What is the Kyo Logic Rich Text Editor built on?

It is built on Summernote, a well-documented open source editor, running inside a FileMaker web viewer.

Can I use different toolbars on different layouts?

Yes. You can create many standalone configurations, each pointing to a different field, so one can stay minimal while another offers the full set of tools.

Do I need to write new scripts for every field?

No. The communication between the editor and FileMaker is abstracted out, so adding a configuration does not require new scripts. The editor updates the field as the user types.

Quick takeaways

  • Pick the one field where formatted text matters most to customers and start there.
  • Use a minimal toolbar for internal notes and a full one for templates and client-facing text.
  • Check how formatted content looks anywhere it leaves FileMaker, such as printed reports and emails.
  • Download the add-on and set up two configurations to see the difference.

Get the Rich Text Editor add-on

Tell us where to send it and we will email your download link right away.

From Tools to Infrastructure: The Critical Shift to Business Infrastructure

Every business uses tools like spreadsheets, shared documents, and simple apps to get things done. These options are quick, easy, and usually just right for the task.

As organizations grow, these tools slowly shift from being temporary fixes to becoming the backbone of daily operations.

At this point, businesses need to move from using simple tools to building real infrastructure.

How Tools Become Critical Systems

This change does not happen all at once. It takes place over time:

  • A spreadsheet becomes essential for reporting
  • A shared document manages a key workflow
  • A lightweight app supports daily operations
  • Multiple tools connect through manual processes

Eventually, these tools become a core part of how the business operates.

The Problem with Staying in “Tool Mode”

Tools are made to be flexible, not to handle large-scale needs. When used as infrastructure, their limits start to show:

  • Limited control: Minimal permissions and validation
  • Fragmented data: Information spread across multiple systems
  • Manual processes: Heavy reliance on human coordination
  • Lack of visibility: No unified view of operations
  • Inconsistent performance: Processes break under increased demand

The solutions that worked at first become harder to manage as things get more complex.

Recognizing the Inflection Point

At some point, teams begin to notice the pressure:

  • Reporting takes longer
  • Onboarding new employees becomes more difficult
  • Processes rely on specific individuals
  • Errors increase as volume grows
  • Teams spend more time managing tools than executing work

These signs show that tools are no longer enough. They have become infrastructure but lack the support needed to function well.

Building Real Systems for Real Operations

Claris FileMaker helps organizations take the next step. Rather than depending on separate tools, teams can:

  • Centralize data and workflows
  • Automate repetitive processes
  • Apply consistent validation and governance
  • Create role-based access across departments
  • Build systems that adapt as the business changes

The goal is not to replace every tool, but to build a strong foundation that supports them all.

Why This Matters

A business’s infrastructure affects how easily it can grow. With well-designed systems, growth is easier to manage and predict.

Without a solid foundation, things get more complicated, and progress slows down.

Moving from tools to real infrastructure takes time, but it is important to know when to make the change. Building the right systems helps your business grow stronger, not just bigger.

If you want to move from scattered tools to a scalable system with Claris FileMaker, contact Kyo Logic to get started.